
The title says it all. Gwen LaFleur is our guest and we couldn't be happier.
Without further adieu:
Hi all! This is Gwen Lafleur and I’m thrilled to be the Relics & Artifacts Guest Ambassador for May! I’ve been a fan of Relics & Artifacts since they first were first released, so it was a lot of fun for me to have this opportunity to come up with a project to share this month. I combined resin blanks, wood, Bohemian jewels, rubber stamps, and Dresden trim with paint, stencils, and some other fun supplies from my stash to make this mixed media canvas which I’m calling “Ancient Energy.”

I took lots of photos along the way and put together a tutorial so that you can see how this piece came together.
To start, I took an 8” x 8” canvas and pulled out some vintage book text, vintage wallpaper, and some Italian papers, then I tore them into pieces and collaged them onto the background with matte medium.

Once the papers were down, I used Raw Sienna and Permanent Maroon heavy body acrylic paints and dry brushed onto the background to integrate the papers and start to frame the canvas.
Next, I took my Art Deco Bookplates Stencil from StencilGirl and used Mars Yellow acrylic paint to stencil just a portion of one of the designs onto the background, turning it at 90 degree angles and repeating it to make kind of a Maltese cross. I deliberately put this off-center… I didn’t want the placement of my focal point to be too obvious, and using the rule of thirds for this helps to give it a lot more visual strength so I planned the background with that in mind.

I went over it with a coat of Transparent Brown Iron Oxide paint to help it stand out more from the background, then I used Transparent Shading Gray High Flow Acrylic paint to add some shadowing to the cross.

In the photo above, you can see where I also adhered a bit of gold leaf onto the background – I really like the shine and texture you get from adding just a hint of a metallic accent.
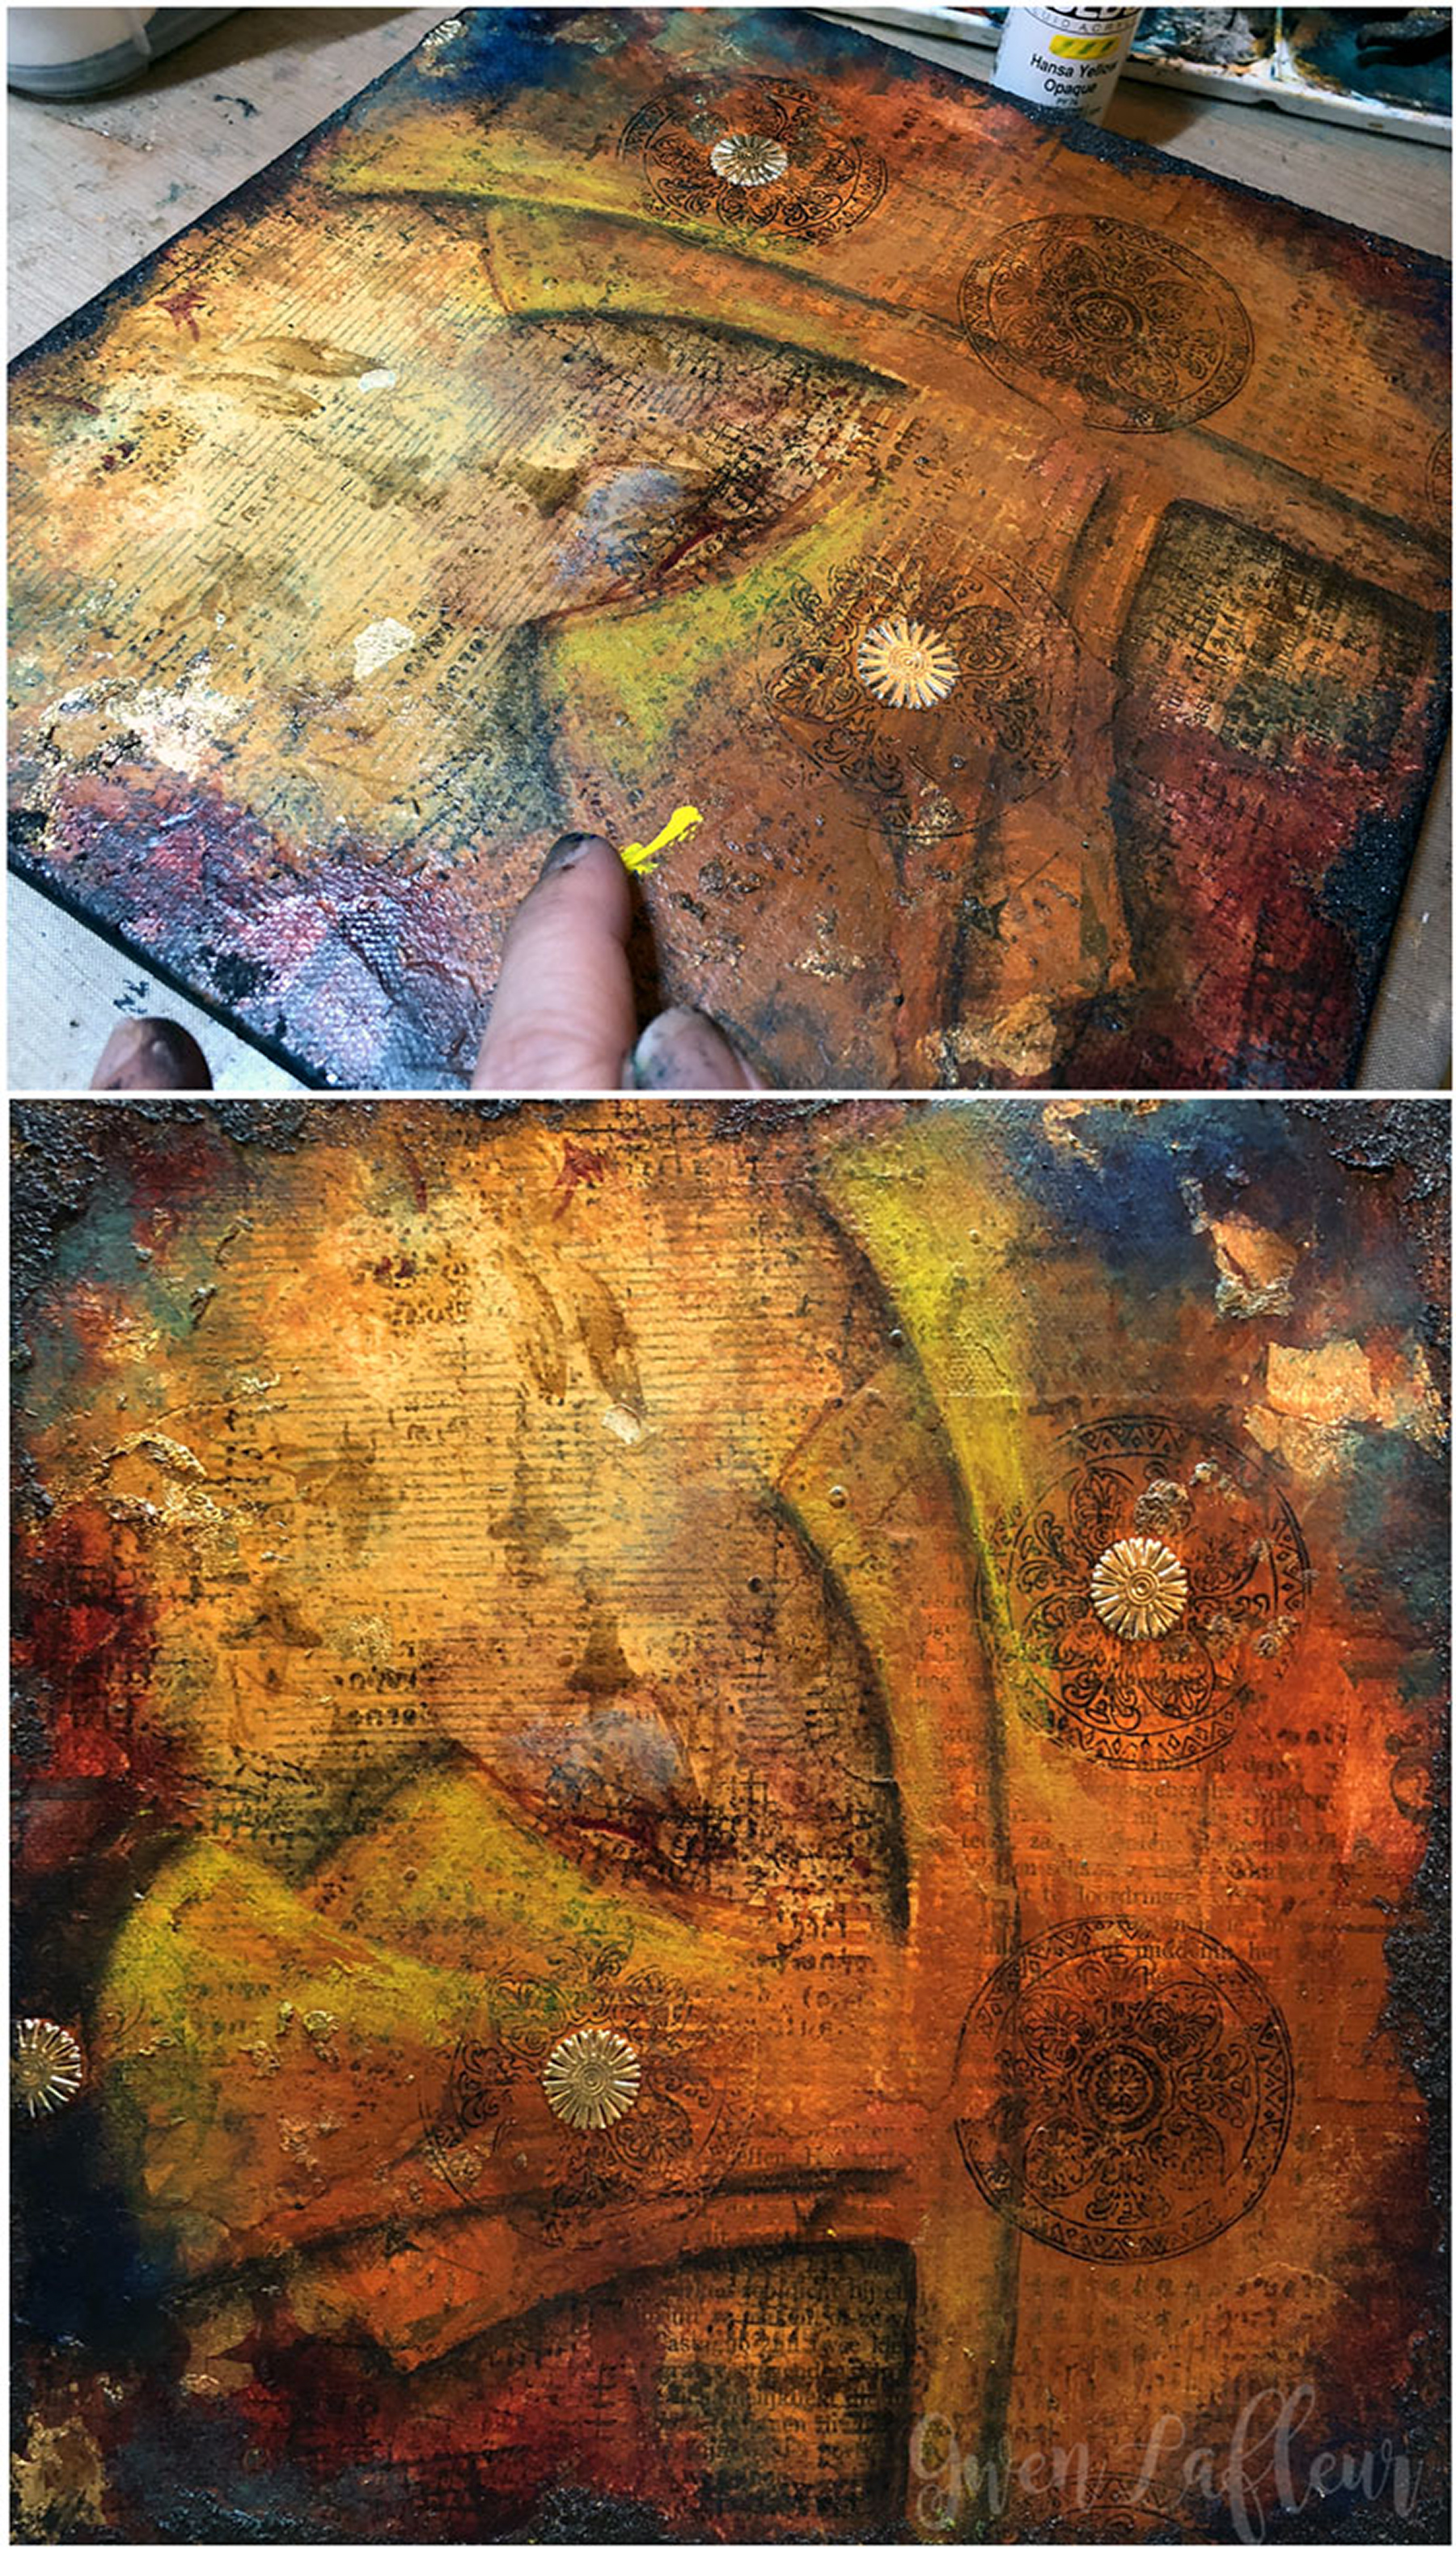
When the paint was dry, I used the Relics & Artifacts Mandala rubber stamp with black Staz-On ink, spaced equally along the arms of the cross. Before the ink completely dried, I used a baby wipe to rub off some of the lines so that the design would look a bit weathered.

I then used the smallest shapes from the Dresden Trim Halo Gold set to accent the centers of the stamped mandalas.
To finish off my background, I used some Hansa Yellow Medium acrylic paint and spread it on using my finger to create a highlight along the cross, dabbing with a baby wipe to pull it back as needed. I also added some stenciling with one of the designs from the 9” x 12” stencil in the Heraldry kit that I designed for StencilGirl’s StencilClub, then added some stamped texture and handwritten words and letters scattered around the canvas. I also added a bit of Permanent Maroon, Ultramarine Blue, and Veridian Green paint around the edges (this would pull in some of the colors on one of the pieces I was planning to use in my focal point.) To finish the background, I used some Finnabair Graphite texture paste around the edges.
With the background done, it was time to start working on my focal point. I wanted to so something layered, textured, and dimensional, so I picked out several pieces that I thought would work well together and got busy altering and assembling.
The base of my focal point was going to be one of the Helios I wood pieces. I took that and coated it with some light matte medium, using a palette knife to apply.

I let the molding paste dry overnight, then I used some metal files to sand the edges and clean it up. I wanted lots of texture, but I didn’t want to obscure the shape of the wood and the files worked perfectly for that.
Next I took some Paynes Grey matte fluid acrylic paint and covered the entire piece, then used a black glaze to get into the nooks and crannies – I wiped it back from the top layers with a baby wipe leaving the dark paint in the crevices for added dimension. While the paint was still wet, I sprinkled in some Charpentier colored Artisan Powder for a more weathered look.

To complete this layer, I glued on some variegated gold leaf for some shine to contrast with that grungy texture, and also to tie in with the background.
For the next layer, I took a Dresden Trim Gold Rosette and colored it with alcohol inks and then edged it with a black Staz-On ink pad.

I knew that the very top layer of my focal point was going to be a resin blank, and I decided to use the largest piece from the Cameos set. I painted it with Copper fluid acrylics, then used Anthraquinone Blue mixed with just a touch of Carbon Black to start to age and rust the piece, adding layers of Quinacridone Burnt Orange, Vat Orange, and Transparent Yellow Iron Oxide to complete the aging process.

To add to the appearance of rust, I like to throw in a pinch of texture powder and mix it in while the paint is wet – it really helps it look much more realistic!
For a finishing touch, I used some Finnabair Aged Brass Metallique Wax and just lightly brushed it onto the high points of my painted cameo as well as on my painted and textured Helios I wood piece.

I cut a length of Bohemian Jewels in Amethyst to the size I needed, then glued it to the edge of my cameo and let it dry.
Next it was time to assemble. I chose an embroidered Kuchi patch (also called a Gul i Peron medallion) as one of my layers and glued my bejeweled cameo into the center (I actually cut out the center of the patch first so that I can use that in another project.) I cut the center out of my Dresden rosette and saved it for later as well, then glued the Dresden to the Helios piece and then adhered all of the layers together into one nicely dimensional focal point.

Once the piece was assembled, I adhered it into position I wanted on the canvas and made sure that it laid flat until the glue was completely dry.
In the meantime, I added a few finishing touches to tie the background and focal point together. First, I used some frayed sari ribbon for some texture and color on two of the edges.

Finally, I added some striped vulcanized rubber disc beads from Africa as well as some yellow dots of pebeo relief cream to strengthen the lines in the background and add just a bit more visual interest.
Voilà! The canvas was complete! Here are a few close-ups of the finished piece so that you can see some of the details.


That’s it! I hope you’ve enjoyed my project and tutorial just as much as I enjoyed making them, and I just want to say a big “thank you!” to the team at Relics & Artifacts for letting me join in the fun this month! It’s been a blast!
Thanks again and enjoy!
Gwen