Hello, this is Patti Campbell. I am this month’s guest artist for Relics and Artifacts.
Sandra’s ArtFoamies inspired me to create this piece of faux stained glass.

For this project I used:
A piece of glass and frame, I used a piece from a large picture frame that measures 24”x19 ½ “
A large sheet of white paper approximately the same size as the glass
Tulip Metallics Dimensional Fabric Paint in Gold
Watercolor Paint:
Daniel Smith Raw Sienna Light
Winsor and Newton Red Deep
QOR in Ultramarine
QOR in Sap Green
QOR Burnt Sienna
Winsor and Newton Lamp Black
Golden white acrylic paint
A pencil
Palette knife
A medium sized flat brush
Toothpicks
Glass jars for mixing
Aleene’s Clear Gel Tacky Glue
Paper towels
Baby wipes
Ziploc sandwich bags
Scissors
Compass
Painter’s tape
Step 1:
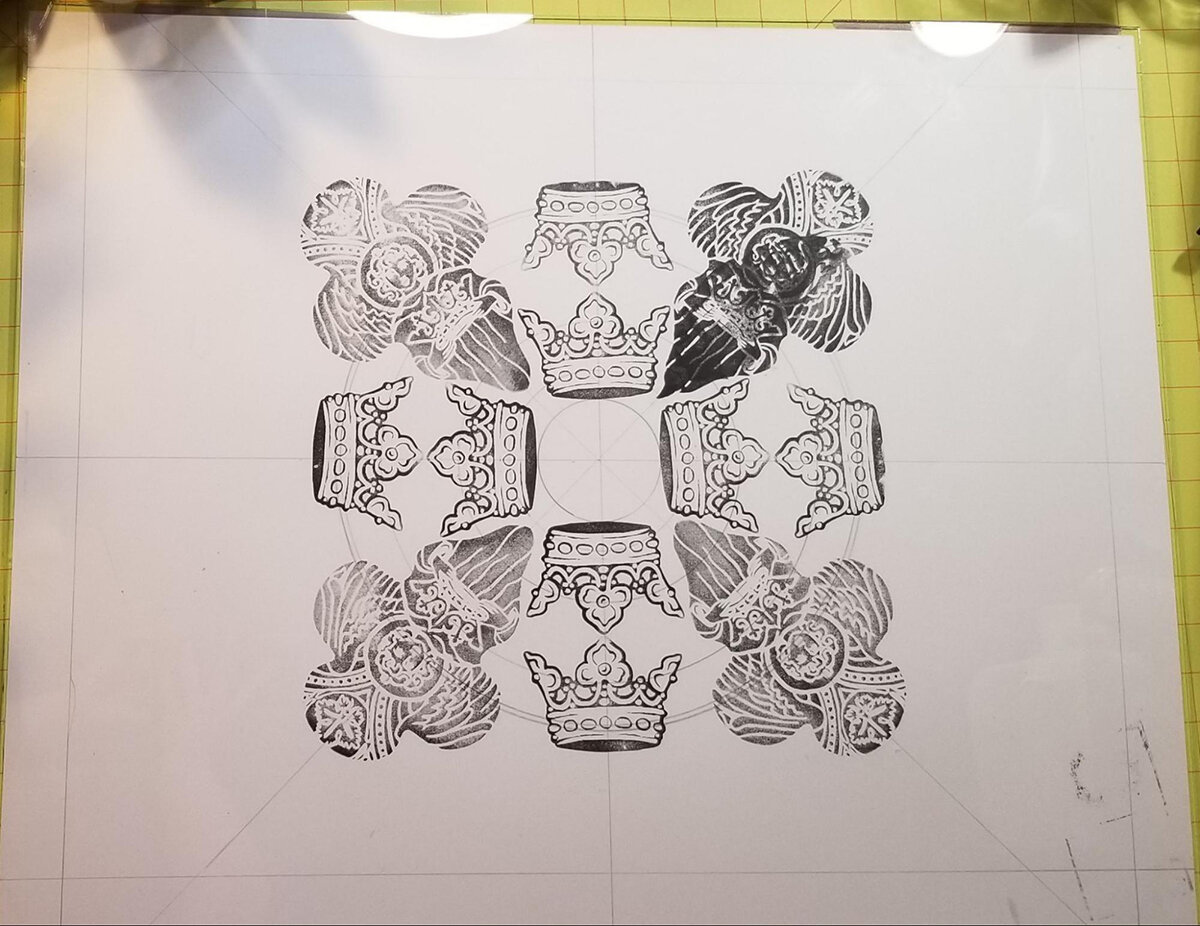
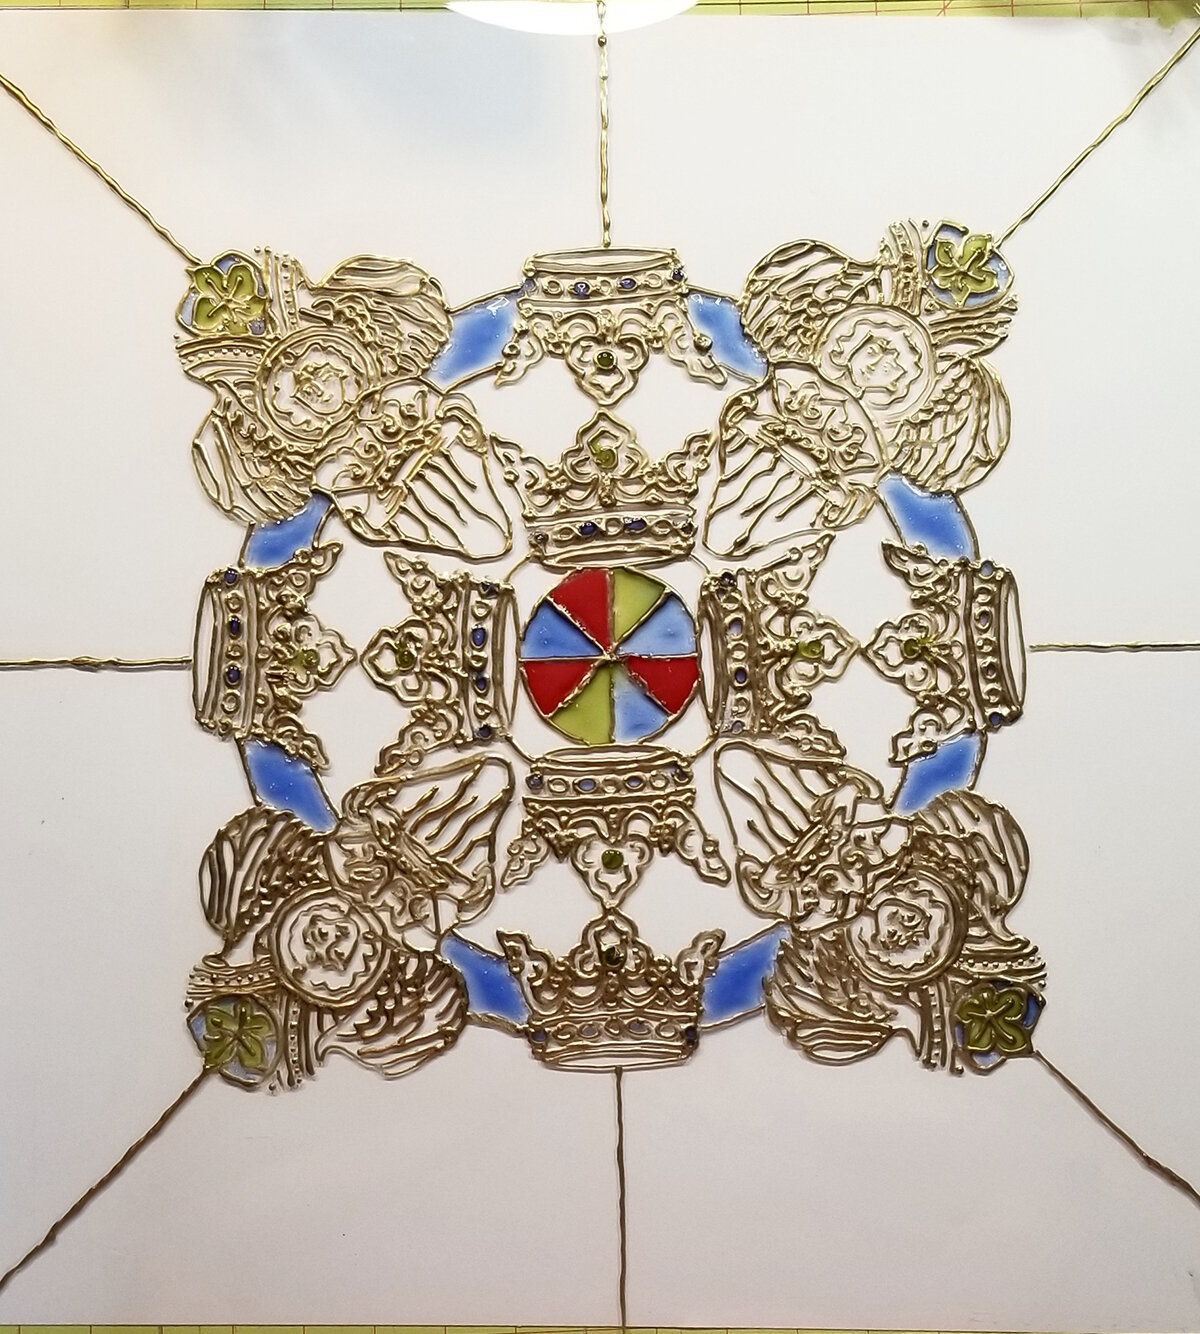
Using a ruler to find the center of the paper, I drew a line horizontally and vertically across. That left me with four equal spaces. To divide these four spaces I used diagonal lines to create eight spaces. Then, starting at the center, I used the compass to draw circles that increased in size as I went towards the outer edge of the paper.
Step 2:
Using the Royalty ArtFoamie, I stamped the crown at North, South, East, and West on one of the circles I drew. Then I mirrored the stamp above each image.
Step 3:
I then stamped the Echo Angel ArtFoamie in between each set of crowns.
Step 4:
I taped my paper to the back of the glass with painter’s tape.

Step 5:
I began to trace the images onto the glass using the dimensional fabric paint. I was very careful not to touch the wet paint.

Step 6:
After I had finished tracing the images, I then traced the lines and circles I had drawn. I allowed the paint to dry completely before moving on to the next step.

Step 7:
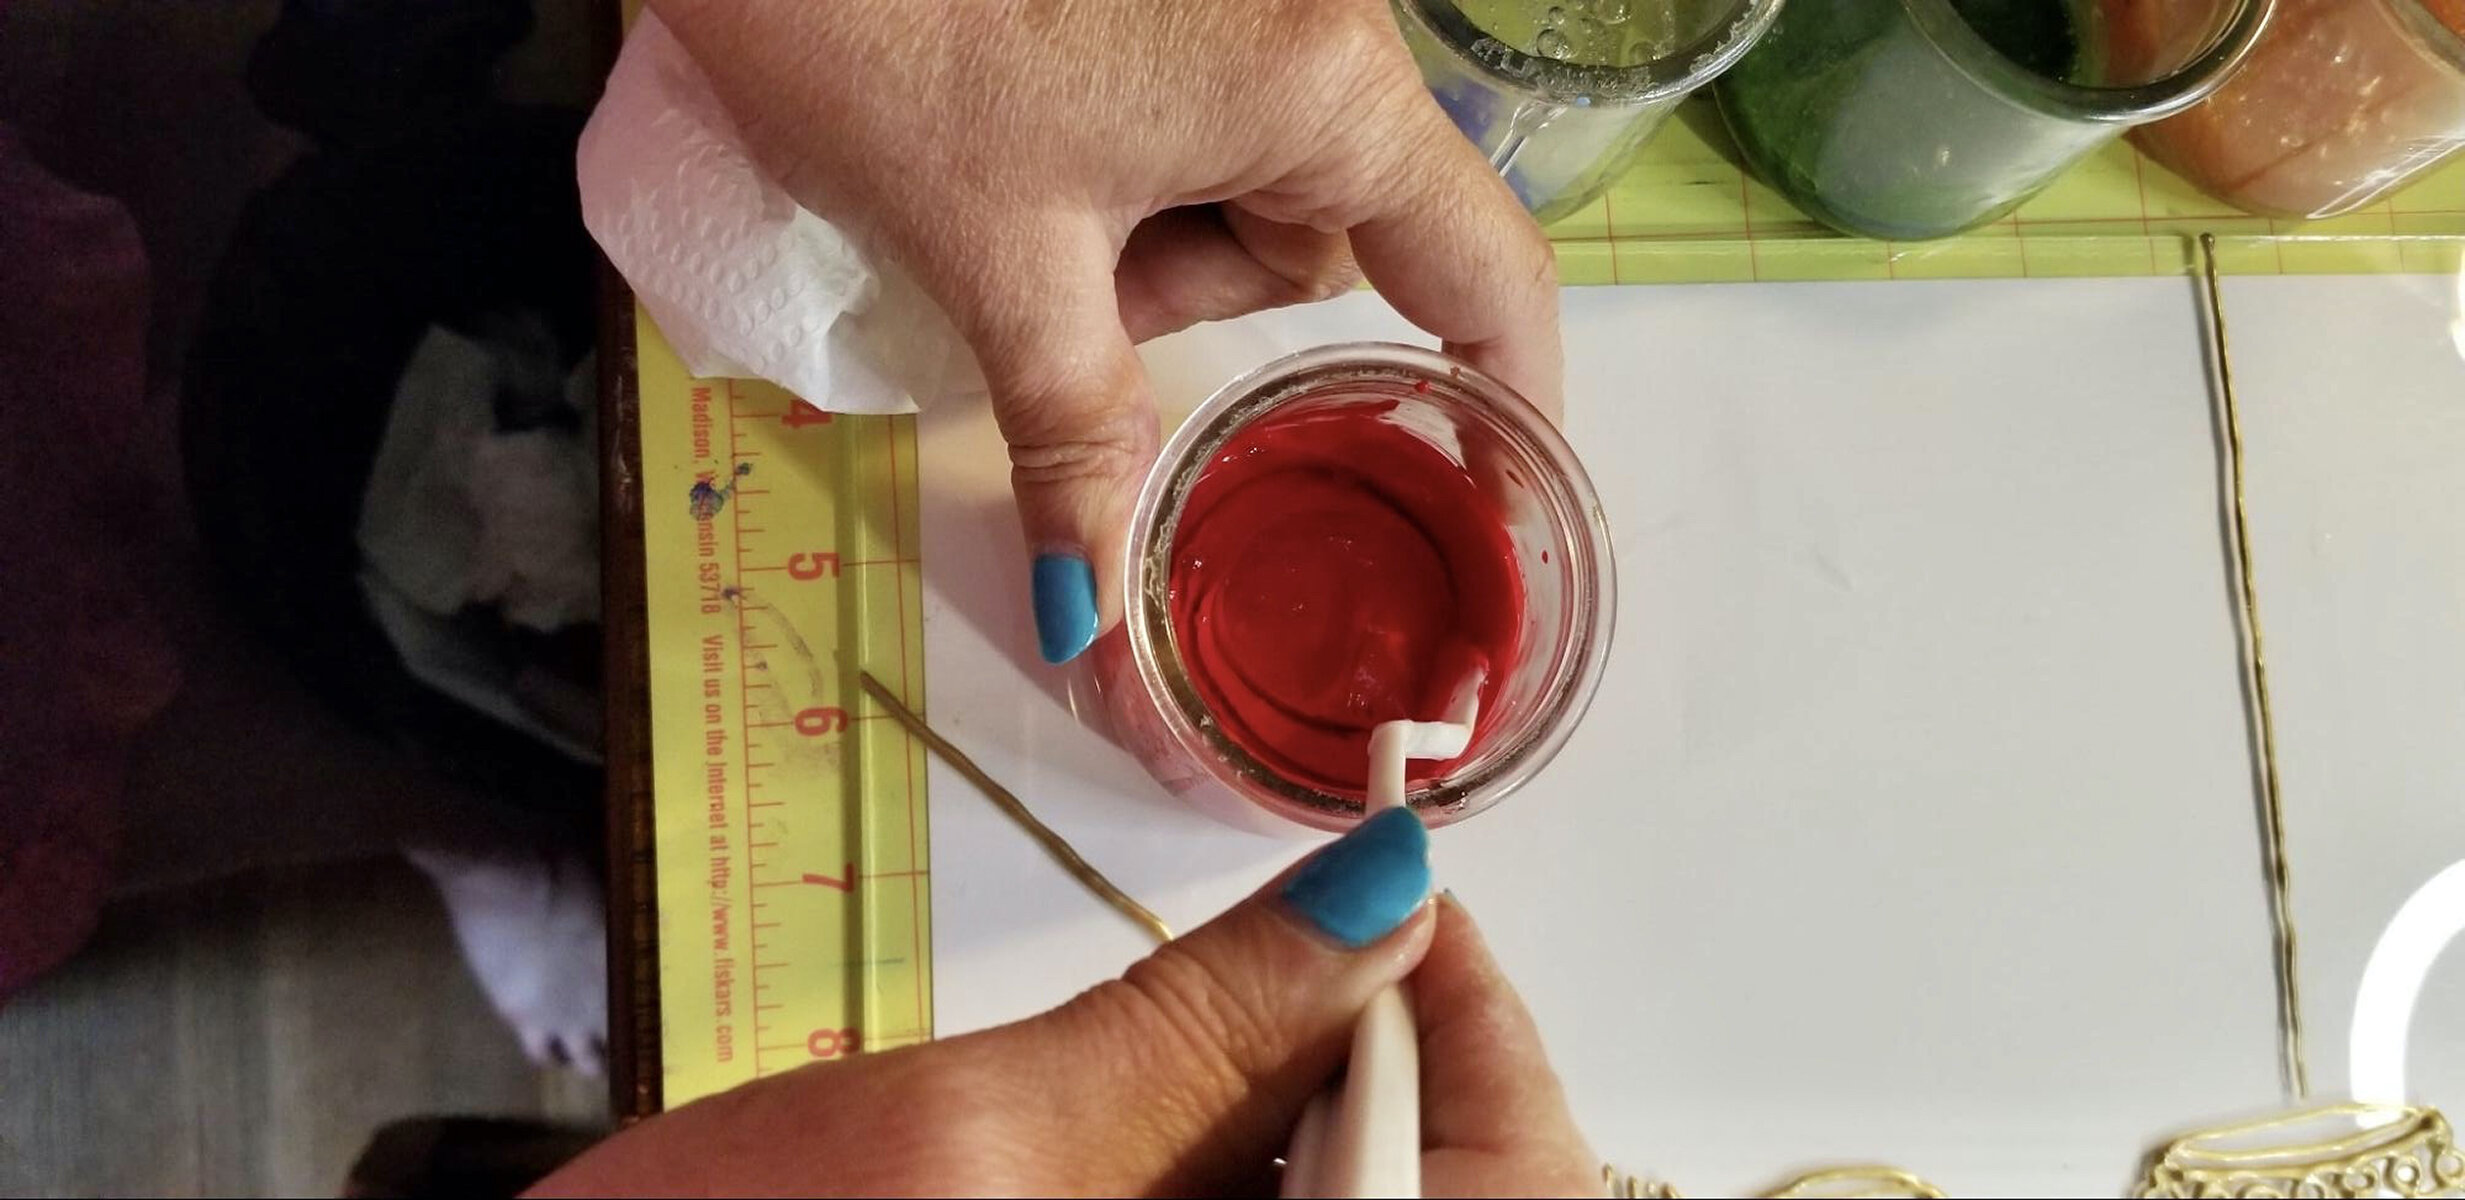
In seven glass jars, I divided up my clear tacky glue. I then added the different paint colors to each jar. I mixed the colors with glue to help it stick to the glass and to make it more transparent to have a stained glass effect. I also added a bit of water to help thin it out a bit.

Step 8:
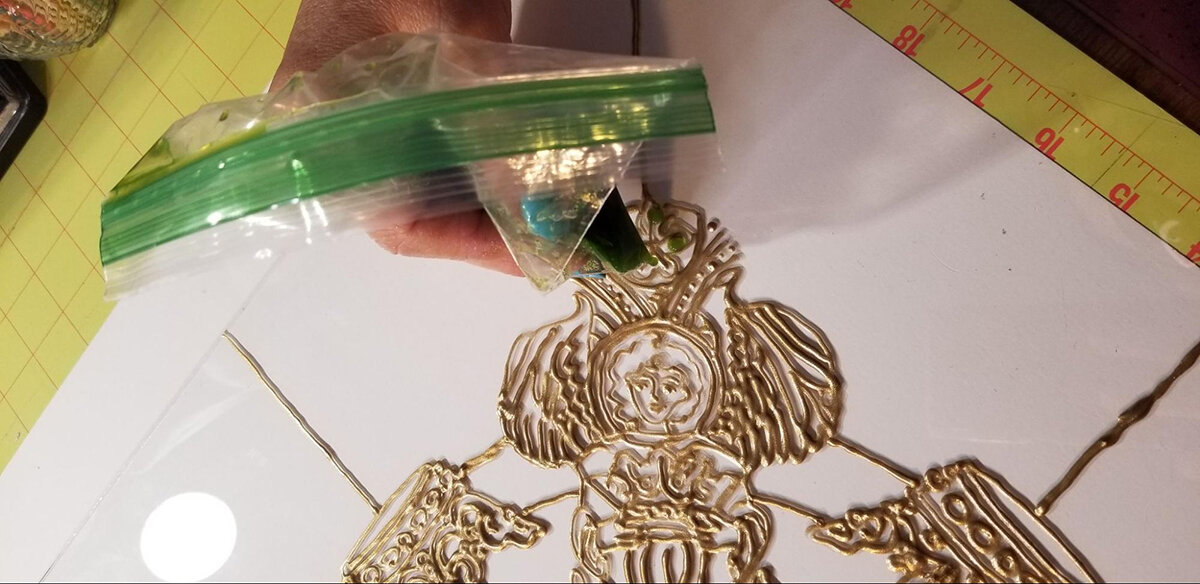
I poured each paint mixture into the ziploc bags and clipped the corner of the bag to make a tiny hole. This was the easiest way I found to get the mixture into the small spaces.
Step 9:
I began to fill in my design on the glass using a toothpick to help me spread the paint mixture into the smallest areas.

Step 10:
In the larger areas, I used a palette knife to spread the paint mixture. After everything dried completely, I placed the glass back into the frame.


Thanks for taking the time to read!
Love and laughter,
Patti